Wednesday, April 27, 2011

Classic Thai Green Curry

Kirin Tribe
Thailand is such a beautiful and enchanting place to visit, from up north in Pai with the Kirin Hill Tribe to down south where you can island hop and get a different feel at each one and enjoy amazing sunsets.  The food there was delicious and cheap.  If you want to budget then the street food is where it's at.  My girlfriend and I ate at the little push carts regularly which was really good.  You could get a quick pad thai for a little over $1.  While we were up north, for breakfast in the morning was rice soup with pork balls.  Since it was cold up there in the mountains it was a perfect dish to start the day before embarking on some sight seeing
Sunset on Koh Tao
Then there is the big city of Bangkok.  Lots of people, cars and motorbikes (we're not talking crotch rockets either).  There is a lot of things to see.  You have to be careful not to get ripped off,  because as a farang (what the Thai people call Westerners) it is.  You can be easy pickins for the locals always trying to give you a "good" deal.  I've learned my lesson though.  Even the taxi drivers try to scam you.  I remember this one time we needed to go to the airport and the driver was charging some outrageous price and I told him no, use the meter.  He refused so we got into another taxi and then the guy suddenly changed his mind and said he'd take us but we left him high and dry.
Tuk-Tuk
The tuk-tuks were an adventure too.  They are these 3 wheel mini taxis that can weave in and out of traffic and get you to a location not far away.  The downside is they are loud and the exhaust fumes can be a bit much.  They also always try to take you places you don't want to go, for instance a gem store.  They tell you just to go in and look around.  After asking why from a few of them they said that they get a portion of proceeds if we buy anything, great deal huh?  But it's just something you have to experience. 

Hot dog stand??
So I asked my girlfriend what she wanted for dinner and I got "Green curry like in Thailand".    It was so good while there that even though it was hot and humid we'd still order the dish sweating as it was being consumed and enjoying every spoonful.
I used store bought pastes which tasted good but I like to try and make everything from scratch to see how it compares.  I looked in my Thai cook book and found a recipe.  After going to the store to gather all the ingredients I was ready!

Green Curry Paste
2 tsp coriander seeds
1 tsp cumin seeds
2 tsp white peppercorns (I used black)
20 fresh green Thai chillies or a combination of mild and hot chillies
10 cloves of garlic
3 shallots sliced
1 tbsp grated galangal (ginger would also work)
1 tbsp sliced fresh or frozen lemongrass, white part only
2 tbsp sliced kaffir lime rind or lime zest
1 tbsp sliced coriander roots and stems
1 tsp shrimp past
1 tsp salt

Combine the corander, cumin seeds and peppercorns in a small pan and roast over medium heat, stirring constantly for a minute or two until you can smell the nice aromas.  Transfer to a plate lined with kitchen paper to cool.
Pound the spices in a pestle and mortar until finely ground.  Combine all the ingredients except for the ground spices in a food processor, add a tablespoon of water and process until smooth.  Since I don't have one I used a pestle and mortar.  The 2nd time I made it, after getting a work out from pounding it in the pestle and mortar, I spooned it into my smoothie maker and whizzed it up which just made it a bit more combined.
Stir in the ground spices.  Transfer the paste to a clan jar and refrigerate for up to a week  or divide into 1 tablespoon portions and freeze in ice cube trays.  If you are going to keep the past in the fridge for any lenght of time, pout just enough oil over the top of it to cover.  This will help keep the paste fresh.


Thai Green Curry
1 tbsp oil
3 tbsp green curry paste
2 x 400ml (14 fl oz) cans of coconut milk
450 g (1 lb) chicken thigh fillets, trimmed and sliced (Shrimp and chicken breast would also work)
3 kaffir lime leaves (or 1 tsp grated lime zest)
1 tbsp fish sauce
2 tsp grated palm or soft brown sugar
2 courgettes (zucchini) cut into bit size pieces
2-3 hot red chillies seeded and sliced into long strips
1/4 cup basil leaves

Heat the oil in a wok or large pan over medium heat and add the curry paste.  Cook for 2-3 minutes until fragrant.
Reduce the heat a little and add the coconut milk.  Stir and cook until an oily film forms on top.
Stir in the chicken and lime leaves (or zest) and simmer for about 5 minutes until the chicken is cooked through.
Add the fish sauce and sugar and bring to a boil.  Add the cut up courgettes (zucchini) and cook for a further 5 minutes.


Turn off the heat and taste.  Adjust seasoning by adding more fish sauce, sugar or chilli as desired.  Top with basil leaves.
Serve with a side of steamed jasmine rice.


Tuesday, April 19, 2011

Breakfast of Champions


Breakfast is one of my favorite meals and I love my eggs - scrambled, fried, poached, hard boiled..etc.  I eat 2-3 eggs in the morning and if I'm hungry in the afternoon I'll scramble up another 2 for a quick snack.  They are an excellent source of protein, vitamins and minerals.  My girlfriend says that in the future we need to have our own chickens for the amount of eggs I eat which I wouldn't mind at all.
I went to the gym earlier this morning and had a great workout hitting my chest and back.  My muscles were screaming for some protein by the time I got home.  I had to make a quick stop at the veg shop for a couple potatoes, can't forget about those carbohydrates.  My usual breakfast is 2 scrambled eggs with toast or a bowl of muesli but wanted to change it up a bit.  I looked in my fridge to see what I could throw in with the scrambled eggs to make it tasty and then started chopping away.  This was a very easy meal to whip up.

Breakfast of Champions  - Serves 2
4 eggs
1/2 medium onion chopped
1/2 orange bell pepper chopped (or any bell pepper would be delicious)
6-8 mushrooms quartered
1 venison sausage (leftover)
1/2 cup of grated cheese (I had cheddar on hand)
2 medium-large potatoes chopped into 1in. pieces
1 medium onion chopped
3 garlic cloves chopped
1 package sausage of your choice
S+P

Heat a large frying pan on med/low heat, add some olive oil and the chopped potatoes cooking for 1-2 minutes.  Add the 1 chopped onion and garlic to the pan seasoning with salt and pepper and give a toss.  Continue to cook for about 15 minutes or until the potatoes are fork tender tossing every couple minutes.  While the potatoes are getting to know the garlic and onion, whisk the eggs in a bowl and set aside. 
Place the sausages in another pan and cook on med/low heat for 15 minutes until done.
Heat another medium sized frying pan, add some olive oil (or if you really want to make it sinful use some of the sausage grease), and throw in 1/2 chopped onion, orange bell pepper, venison sausage and mushroom.  Cook for about 2-3 minutes before adding the eggs.  Continue to cook the eggs for another 3 minutes or until the eggs are done to your liking.  Last but not least add the shredded cheese and give a stir.
Top with some Cholula hot sauce or Franks and dig in. 

Monday, April 18, 2011

Cheese Burger My Way


Well Spring is here in England and the weather has been superb with lot's of sunshine and warmth.  With that, I felt it was only right to get the party started and fire up the grill.  I like using charcoal because I believe the food tastes better than if using propane, but that's just me and everyone has their own preferences. 
So I decided that a thick, juicy, mouth watering burger along with chips would be great to have flaming on the grill.  To me there's just something about grilling a nice burger, hearing it sizzle and the smell that brings back memories of spring, summer and good times.  I'm looking forward to many more meals on the coals.

Cheese Burger My Way
500g minced beef
1/2 onion finely chopped
2 garlic cloves finely chopped
1/2 - 1 red or green chilli finely chopped
1 tbsp low sodium soy sauce
1.5 tbsp Worcestershire sauce
S+P

Toppings I had on hand
spinach
tomato
avacado
onion
ketchup
mustard
Mayo/miracle whip

Combine all the ingredients in a bowl and mix well with your hands.  Shape into 3 patties or 4 if you like them smaller.  Place on grill and cook for 3 minutes per side depending on how well done you like them.  Add your choice of cheese and cover until it's nicely melted smothering the burger.
I served mine with some home made chips by slicing up a few potatoes, seasoning with salt and pepper, tossing in olive oil and baking for 10 minutes or until a crispy soft.  I also made my own buns where I got the tasty recipe from Reni over at cinnamon spice and everything nice.  Ever since making these buns I haven't bought any at the store, they are super easy and wonderfully delicious!  Thanks Reni!  Oh, one more thing is you can't forget a nice cold beer to compliment this delicious meal!

Saturday, April 2, 2011

Homemade Spinach Pasta and Meatballs

Vernazza - Cinque Terra
I was looking through some old pictures on my computer of when I went backpacking in Europe for 6 weeks.  It was one of the best times of my life, opening my eyes to the world and catching the "travel bug".  I didn't want to stop traveling but I kind of had to because I was running out of money.  But on that trip I learned and experienced so much and met a bunch of new friends.  There is so much of the world I want to see.  One of countries I thoroughly enjoyed was Italy.  The food was amazing and the wine was cheap which just kept on flowing!  I ate gelato 2-3 times a day it was that good, if you've had any you'll know what I'm talking about.  Unfortunately while I was there I didn't take any pictures of the food because I wasn't as into cooking/food as I am now.  But when I go back it will be a whole different experience, mostly about food and wine along with practicing my Italian. 
When I was in Florence I had a nice dinner of spaghetti and meatballs accompanied with wine of course, which is what inspired me to write this post.  I don't know why I haven't tried making meatballs before. They are cheap and delicious so you can't go wrong.  I know it may not
View from St Peter's Basilica
be the healthiest (unless you buy lean meat) but hey, it's worth it.  Just to warn you I did not measure any of these ingredients out, just put a little bit of this and a little bit of that.  However I believe the ingredient list is very close.  They came out great.  Feel free to be creative.


Homemade Spinach Pasta and Meatballs
Florence
1lb minced beef (ground beef, I just got used to calling it that since living in the England)
1/2 cup of bread crumbs
2 garlic cloves minced
1/4 cup fresh parsley chopped
1 tbsp dried oregano (fresh if you have it)
1/4 cup of grated Parmesan cheese
2 tbsp of goats cheese (optional) 
1 egg
1 tsp sugar
S+P

Sauce
Trevi Fountain - Roma
400 mL passata
1 tsp dried oregano
1 tsp dried basil
1 tsp sugar
1 bay leaf
S+P

Pasta
250g pasta flour
3 eggs
200 g spinach

In a large sauce pan cook the spinach and transfer to a plate.  Once it has cooled down, give it a couple of good squeezes to get all the water out.  Finely chop and set aside.  To make the pasta you can revisit this post.  The only difference is you will need to add the spinach in with the eggs.  If the pasta seems to wet then add a small amount of flour.


On to the meat balls - Place the minced beef, bread crumbs, garlic, parsley, oregano, egg, sugar, and Parmesan cheese in a bowl and season with S+P.  Mix with your hands until all the ingredients are fully incorporated.  Now give a taste and adjust seasoning.....just kidding, unless you like the taste of raw meat.  Take a pinch of the mixture and roll it into a ball a little bigger than a ping pong ball and set them aside.  You can make them as big or as small as you want.  After rolling about half of them I then added the goats cheese and rolled the rest.

Heat some olive oil in a large sauce pan and then toss in the meat balls.  Brown on all sides.  Add in the ingredients for the sauce, give a stir and cover.  Turn the heat to medium/low and simmer for 15-20 minutes. 
Serve over pasta and top with a little Parmesan cheese. 

Thursday, March 24, 2011

Butter Chicken


I saw Gordon Ramsay on the telly a while back when he was going to India and getting back to cooking authentic Indian food.   All the dishes he was cooking up looked fantastic, plus I'm a fan of Indian food.  So I decided to buy the book and haven't been disappointed since.  The curries and dishes from the book in my opinion are better than take aways any day.  (At least the ones I've had, I'm all for trying new places)

One night I was in the mood for an Indian dish, so I pulled out my Gordon Ramsay's Great Escape cook book and flipped through the pages.  My mouth was watering at every recipe.  I decided on Butter Chicken because I've made it a few times before and it's really tasty!!  Even though there is a lot going on the flavors are amazing and it's worth the time letting it marinate.

Butter Chicken
Serves 4

Marinade
800g boneless and skinless chicken thighs cut into bite size pieces
3 garlic cloves finely chopped
2 cm knob of ginger peeled and finely grated
1/2 tsp salt
1/2 tsp hot or mild chili powder
1.5 tbsp lemon juice
75ml natural yogurt
1/2 tsp garam masala
1/2 tsp ground turmeric
1 tsp ground cumin

Sauce
1.5 tbsp ghee or melted unsalted butter
2 garlic cloves finely chopped
2 cm fresh ginger peeled and finely chopped
2 cardamom pod, seeds lightly crushed
3 cloves
1 tsp ground coriander
1tsp garam masala
1tsp ground turmeric
1 tsp hot or mild chili powder
250 ml tomato puree
1 tbsp lemon juice
40 g unsalted butter
100ml double cream
1 tbsp chopped coriander to garnish

Place the chicken in a bowl and add the garlic, ginger, salt, chili powder and lemon juice.  Give a good mix and cover with cling film chilling for 30 minutes.  Mix together the yogurt, garam masala, turmeric, and cumin and add to the chicken, making sure each piece is well coated with all the yumminess.  Cover again and chill for 3-4 hours to let the flavors make some love. 

Preheat the oven to 180ºC/350ºF.  Put the marinated chicken pieces on a grill rack set on a baking tray and bake for 8-10 minutes.

For the sauce, heat the ghee or utter in a pan and add the garlic and ginger.  Fry for a minute or so then add the cardamom, cloves coriander, garam masala, turmeric and chili powder.  Stir well and fry for 1-2 minus until they give off a lovely aroma.  Stir in the tomato puree and lemon juice and cook for another couple of minutes.  Add the chicken pieces to the sauce and stir well to coat.  Finally, add the butter (that's why they call it butter chicken) and cream and stir continuously until the butter has melted and the sauce is smooth as silk.  Taste and adjust seasoning if needed.  Transfer to a warm bowl and serve hot over rice, garnished with chopped coriander.

Thursday, March 10, 2011

Squid Stuffed With Shrimp


I love squid whether is fried, sauteed, baked,...you get the idea and I love trying new dishes.  So I put those two together and found a great dish to make.  I got The Silver Spoon Italian cook book for Christmas from my wonderful girlfriend and have been using it quite often.  Maybe she was getting bored with my meals and thought I needed some inspiration...haha (totally kidding)  With 1200 pages and over 2000 recipes I won't run out of meals to cook anytime soon.  So this is where I adapted the recipe from and add some changes to it.  

Squid Stuffed With Shrimp
3 large squid cleaned
300g/11oz cooked shrimp peeled and chopped
1 medium sized potato chopped (peeled if you like, I kept the skin on mine)
3 tbsp extra virgin olive oil
2 egg yolks lightly beaten
2 garlic cloves
2 tbsp bread crumbs
1/4 cup of double cream
1 cup of passata
2 tbsp fresh parsley chopped (separated)
1 tsp dried basil
S+P

Boil the potato until fork tender, drain and mash with fork or potato masher.  Cook the squid tentacles in salted boiling water for 3 minutes, drain and chop.  Mix together the mashed potato, tentacles, shrimp egg yolks, 1 tbsp parsley, and bread crumbs in a bowl and season with a little S+P.
Spoon the mixture into the body sacs of the squid, making sure not to overfill them, and close with toothpicks (I didn't have any and it started to squirt out but no big deal).


Heat EVOO in a large frying pan, add garlic and cook for a couple minutes until browned, then remove.  Add the squid to the pan and cook over low heat for about 25-30 minutes.  Stir the cream into the passata, add the remaining parsley and basil and pour over the squid heating through.  Taste and add seasoning if needed.

I served mine over whole wheat pene.  Buon Appetito! 

Thursday, March 3, 2011

Mom's Sloppy Joes


I remember way back in middle and high school the great food that was served....just a bit of sarcasm.  Sloppy Joes especially with the meat in some red sauce steaming in the tray waiting to be spooned onto a small, flat, tasteless bun by the lunch lady.  This song reminds me of it oh so well.  I never let my taste buds anywhere near that chow.
Now on the other hand my mom's Sloppy Joes were fantastic.  With my dad working long hours and my mom going back to school we had these regularly because they are really easy to whip up and delicious.
When I was home last my mom gave me a copy of the family cookbook.  We have a large Italian-American family and it was my Aunt Loretta's idea to compile a list of everyone's favorite home made recipes to share and put them into a little book.


This has some great recipes in it.  No it's not for sale, just something that was passed around the family...but that gives me an idea for a future one!  So this is where I got the Sloppy Joe recipe from.  This recipe actually came from a cousin about 30 years ago and has been passed around to many family members but I call it mom's. 

Mom's Sloppy Joe's
1 lb ground beef
1 small onion chopped
2 garlic cloves finely chopped
1 tbsp vinegar
1 tbsp mustard
1 cup ketchup
1 tsp salt
1/2 tsp black pepper
About 1 tbsp Olive oil
Shredded cheddar cheese to top it off

Heat oil in a large skillet and saute the onions and garlic for 1-2 minutes.  Throw in (not literally) the ground beef and cook through.  Add the vinegar, mustard, ketchup, S+P and give a good stir.  Simmer for 15-20 minutes.
Since I like to do everything from scratch I even made my own rolls.  I've visited and tried many dishes from this site many times and have never been disappointed.  This is a great recipe for home made buns/rolls.  I tested one right out of the oven because I had to see how it tasted, I let it cool of course but just a little.  It was really good so I scarfed the rest of it down.  No more store bought buns for me.
I like mine with cheese but you can leave it out if you want.  I also served it with some chips (that's what they call them here in England)/potato wedges and a nice cold gin and tonic.  Be sure to have plenty of napkins...why else would they call them sloppy?

Wednesday, February 23, 2011

Lok Lak - Cambodian cuisine

I love to travel, see new places, experience different cultures and of course eat local food.  Before I came to England my girlfriend Nicole and I traveled for 2 months in South East Asia.  One of the countries on the trip was Cambodia.  We went during the rainy season but it wasn't all that bad, just a down pour for about 10-15 minutes cooling things off for a bit.  There were beautiful old temples all over.  Of course when you go to a country where tourism is a source of income to some people the hagglers come out trying to sell you a book or map of the temples which is usually way over priced.  But to me it's all about the experience and they are just trying to make a living. 
There is lots of history there as well with the Khmer Rouge regime which were most known for carrying out genocide.  We visited many of the killing fields on our trip and it was quite disturbing at times.  But overall Cambodia was a really nice place and I thoroughly enjoyed my time there and would love to go back.


The people were really friendly -
 The tuk-tuks were fun and scary
And the food was delicious!!

This is all leading somewhere I swear.  One of the dishes I really liked while there was called Lok Lak.  It is a very simple meal of meat and rice but packed with some great flavors.  So here it is...

Beef Lok Lak
300 grams of beef cut into strips (I used a sirloin and rib eye)
1 medium onion sliced into wedges
1 tbsp EVOO

Marinade
3 cloves garlic minced
2 tbsp oyster sauce
2 tbsp soy sauce
1 tbsp fish sauce
1 tsp sugar
1 tbsp ketchup
1 tsp fresh cracked black pepper
1 tbsp lemon juice

Pepper Sauce
1/2 lime juiced
1 garlic clove minced
1 tsp fresh cracked black pepper
pinch of salt
pinch of sugar

In a medium sized bowl mix all the ingredients of the marinade.  Add the beef strips making sure each piece is coated and let sit for 45-60 minutes. 
While the flavors are getting to know each other, whip up the pepper sauce.  Throw all the ingredients in a small bowl and give a mix, set aside.

Heat the EVOO in a sauce pan, add the onions and cook for 2 minutes.  Add the beef and marinade to the onions cooking for 5 minutes or so depending on how you well done you like it.  Remove from heat and let sit for a couple minutes to thicken.
Serve over a bed of lettuce and a side of rice with the pepper sauce.  Sliced cucumbers could also be added as a garnish.

Wednesday, February 16, 2011

Chicken Chimichangas

Since living here in Bristol, England, people have asked me what food I miss most from back home.  Well of course I miss some of my mom's good homemade cooking, nothing can beat that, but besides that there are a couple of things I miss - Mexican and good Sushi.  Yes I know a weird combination but it's what I like.  There are a few sushi places here but they don't even compare to back home, not quite as many choices for rolls.  That is next on the list to make.  No Mexican restaurants here though.  Sometimes I just feel like going out and looking at a menu full of tacos, chimichangas, burritos and sides of refried beans and rice.  And to top it off would be some salt, tequila and lime.
I make tacos every now and then but I wanted something different.   So as my mouth watered for weeks I browsed through the world wide web and came upon the food blog www.cinnamonspiceandeverythingnice.com/ and found a chimichanga recipe.  It looked delicious and I couldn't wait to give it try.  I made a few changes so here is my version.

Chicken Chimichangas
2 tablespoons unsalted butter
4 tablespoons vegetable oil
1 onion chopped
4 cloves garlic minced
1 green chili chopped finely (I left the seeds in mine but remove for less heat)
1 1/2 teaspoons chili powder
1 teaspoon ground cumin
1/4 teaspoon ground cinnamon
S+P
1 small tomato, chopped, plus more for topping
2 tablespoons chopped fresh coriander (cilantro)
3 chicken breast - shredded or cut into cubes
1/4 cup sour cream
1 - 15-ounce can refried beans
4 - 10-inch flour tortillas
1 cup shredded cheese (I used irish cheddar extra mature and double gloucester since there is nothing here like a montery jack)


Toppings:
Shredded lettuce
Sour cream
Spring onions
Shredded cheese
Tomatoes
Avocado 

I wanted shredded chicken, chunks would work just fine too, so I baked the chicken breast at 375º F for 15-20min or until done.  Take 2 forks - with 1 of them hold the chicken breast down and the other start to pull/tear the chicken away lengthwise.

Next preheat the oven to 450º F.  Melt the butter with 2 tablespoons of vegetable oil in a skillet; transfer to a bowl. Heat the remaining 2 tablespoons oil in the skillet and add the onion, garlic and green chili.   Cook over medium-low heat until soft.  Add the chili powder, cumin, cinnamon and 1 teaspoon salt, give a stir for about 30 seconds to let the flavors come together.  Add the tomato and coriander and cook for a few minutes. Stir in the chicken and sour cream cooking until warmed.  Remove from heat.

Brush a rimmed baking sheet with some of the butter-oil mixture. Spread approximately 2 tablespoons of refried beans down the center of each tortilla (depending on how big they are), leaving a 2-inch border on both ends. Top with 1 cup chicken mixture and 1/4 cup cheese.  Be careful not too add too much filling.  Fold in the ends and roll up.

Place the chimichangas seam-side down on the baking sheet and brush with the butter-oil mixture. Bake 8 to 10 minutes per side, brushing again after you flip.

Add toppings of your choice and serve with rice.

Saturday, February 12, 2011

Pork Chops with Blueberries

I have been looking to cook something different lately and decided to search through some of the cookbooks Nicole got me for Christmas.  I was looking through this Italian book The Silver Spoon (which is about 1100 pages) trying to decide what protein I was in the mood for.  I knew I had some pork chops in the fridge so I started in that section just to see if there was anything that made my tastes buds start watering.  So I came across the pork chops with blueberries recipe which I thought sounded good.  Plus I just happened to have some blueberries that I bought from the veg store earlier. 

Pork Chops with Blueberries
4 pork chops
plain flour for dusting
25g/1 oz butter
3 tbsp olive oil
175 ml red wine
300g blueberries
100g honey
S+P

Preheat the oven to 400º.   To make life a little easier pass the blueberries through a food mill.  I didn't have one of those so I improvised and put them in a sieve and used the back of a spoon to mash them into a bowl.  Add the honey to the blueberries and give a stir. 

Dust the pork chops in the flour.  Heat the butter and oil in an oven proof sauce pan.  Add the chops to the pan and cook on both sides until browned.  Pour in the wine and cook until it has partly evaporated, then season with salt and pepper. Take the blueberry mixture and pour over the chops and place in the oven to cook for 15 minutes.  Remove and let sit for 5 minutes.  I served mine with roasted parsnips and carrots sprinkled with rosemary and a cabbage and cucumber salad with an Asian dressing I whipped up (lime juice, fish sauce, soy sauce, palm sugar and rice wine vinegar).
This turned out to be really good, the sweetness of the sauce was a great flavor.  I will definitely make this again. 

Tuesday, February 8, 2011

Risotto ai Funghi e Pancetta

Risotto is a fairly new dish for me.  I don't know why I hadn't tried to make it before.  I think I've had it in a restaurant a few times but must not have been to impressed.  My girlfriend and I went to another couples house for dinner a while back and we had risotto (thanks Brooke) which was quite tasty.  Now, being that cooking is an enjoyable hobby of mine, this gave me something new to try and make.  There are lots of different ingredients you can add to risotto so I wanted to put my spin on it.
This is an easy dish to make so give it a go and be creative with yours.


Serves 3-4 (depending if you go for seconds or want leftovers)

Risotto ai Funghi e Pancetta
250 grams of arborio rice (about 1 1/4 cups)
2 tbsp of extra virgin olive oil
1 cup of pancetta diced
1 medium onion diced
3-4 garlic cloves finely chopped
8 button mushrooms quartered (Another option would be dried porcini mushrooms)
1/2 cup dry white wine
2 tbsp of butter
3/4 cup of Parmesan cheese
1 liter of hot chicken or vegetable stock

In a large pot or sauce pan, heat the oil and add the garlic and onions.  Cook until soft, about 1 minute.  Add the pancetta and cook for another minute.  Then add the rice and stir for 1 minute making sure the rice gets a good coating.   Add wine and stir until most of the liquid is absorbed.


Add the mushrooms and season with salt and pepper.  Start adding a ladle of stock and continue to stir.


Once most of the liquid is absorbed add another ladle of stock.  Continue adding stock and stirring until the rice is al dente or has a slight crunch with a creamy consistency.  Taste and add salt and pepper as needed.  Remove pot from heat and add 2 tbsp of butter and the Parmesan cheese, stir to combine, cover and let sit for 5 minutes to thicken a bit and let the flavors come together  Then the best part...enjoy your food!


Here is different version I came up with - Shrimp and zucchini - simple yet delicious.  Prepared the same except add the shrimp and zucchini about a half of the way through cooking the rice. 

Sunday, February 6, 2011

Home Made Lasagna

One of my favorite meals my mom cooked was her lasagna.  I remember growing up looking forward to Sunday dinner sitting down with the family and enjoying this wonderful dish.  Since I live so far away now I've had to learn how to make my own version.  Now it's not my moms, but I've made a few tweaks here and there, I think she'd be proud.  I don't want to toot my own horn but I must say it's pretty damn good! 

1 lb lean ground beef
3 14 oz cans chopped tomatoes
1 medium onion chopped
3 garlic cloves chopped
1-2 tbsp dried oregano
1-2 tbsp dried basil
1 tbsp of sugar
2 bay leaves
Handful of fresh basil
S+P
1 egg
250 grams (approx 8 oz) Ricotta cheese
500 grams (approx 4 cups) shredded mozzarella cheese

I like to make my own pasta so here is the basic recipe.  

In a large pot, heat a little EVOO and add the garlic and onion.  Cook for 2 minutes then add the ground beef and brown.  Drain if there is a lot of excess liquid.  Add the cans of chopped tomatoes, dried oregano, basil, sugar, bay leaves and season with salt and pepper.  Also add water to one of the cans filling it half way.  Swirl it around and pour into the other cans making sure to get all the tomato sauce.  Reduce heat and simmer for 30-45 min stirring occasionally.  The longer it simmers will give more time to let all the flavors come out.  Taste and adjust the seasoning if needed.


Preheat the oven to 375º

While the sauce is getting delicious it's time to roll out the dough into lasagna sheets.  Once the sheets have been cut to fit the pan, it is time build it.  I usually have about 5-6 layers of pasta, but you can have as much or as little as you like. 
Beat the egg in with the ricotta.  Place a couple spoonfuls of the sauce in the pan making sure it covers the bottom.  Place a layer of your uncooked lasagna sheets on top.  Add a bit of the ricotta and spread around, then add the mozzarella.


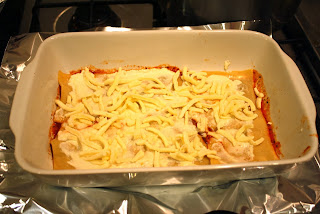
Add some more sauce to cover and then put some fresh basil on top.  Add more lasagna sheets and repeat until the pan is full.  On the last layer, I like to put just a little sauce on top so the pasta gets a little crunchy.  Place on a cookie sheet lined with tin foil so the oven doesn't get all messy. 
Bake for about 45-50 minutes, remove from oven and let sit for 5-10 minutes.


Friday, January 28, 2011

Fried Squid (Calamari)

Every time I eat out I think to myself, "I could probably make this".   Now I love calamari.  I've had it at many restaurants some good and some bad.  How hard could it be to fry some squid?  So I looked up some recipes and after a few failed attempts I changed one thing and it came out delicious.  This can be served as an appetizer with a dipping sauce or it's also great in a salad.

2 medium sized squid (Or however much you want)
1 cup of flour
vegetable oil for frying
S+P


Pour the vegetable oil into a saucepan, about a 1 inch deep and heat the oil.  Place the flour on a plate and season with salt and pepper.  Additional spices could be added to the flour such as smoked paprika or cayenne pepper, whatever floats your boat.  Slice the squid into 1/2 inch rings and toss in the flour making sure to coat well.

To test if the oil is hot enough, use a pair of tongs, dip one of the calamari rings into the oil. If it sizzles and begins to cook, the oil is ready.  Turn heat down to medium to prevent oil splattering.  In batches, dip the coated squid into the oil and fry for 1 minute or until golden brown.
Transfer calamari to a plate with paper towels using a slotted spoon.  Season with salt and pepper.  Repeat this process until all the squid has been cooked. Try not to over cook it or it will be rubbery.
 I decided to put mine into a mixed kale salad topped with some good balsamic vinegar


Friday, January 21, 2011

Crispy Duck with Veg Stir Fry

I've never cooked duck until I got to the UK.  I've had it at various Chinese restaurants in the states and let's just say it didn't leave a good taste in my mouth.  I was going through a few cook books, one of them Chinese Food Made Easy and Gordon Ramsay's Healthy Appetite.  I had found a few duck dishes that looked good so I decided to give them a whirl.  After making them I came up with a combination of a little bit of this and a little bit of that.
So here we go... 

Crispy Duck with Vegetable Stir Fry
2 duck breast
1 tbsp groundnut oil

Marinade
1 heaping tsp of Chinese 5 spice
3 tbsp of freshly grated root ginger
5 star anise
2 cloves
1 tbsp dark soy sauce
1 tbsp light soy sauce
2 tbsp of rice wine

Vegetable Stir Fry
1/4 red cabbage shredded
1/2 savoy cabbage shredded
2 zucchini (courgette) halved or quartered
2-3 tbsp of oyster sauce
1 tbsp of dark soy sauce
1 tsp rice wine vinegar

Place all the ingredients for the marinade into a bowl and stir to combine.  Add the duck breasts and season with a little salt and pepper.  Set aside and marinate for around of 30 minutes. 

Next chop the veggies.  In a small bowl mix the oyster sauce, dark soy sauce and rice wine vinegar together. 

Preheat the oven to 200ºC/400ºF.  In a pan, heat the groundnut oil and place the duck skin side down.  Fry for 4-5 minutes until the skin is brown and crisp. 
Transfer to a baking tray, skin side up this time and cook in the oven for 3-4 minutes (depending on how well done you like the duck).  Pull the duck out of the oven and let sit for a few minutes to the the juices settle before slicing.

While the duck is in the oven it's time to make the stir fry.  In a wok or a pan heat some oil, add the zucchini and fry for a few minutes.  Add the red cabbage and cook for another 2-3 minutes.  Finally add the savoy cabbage cooking for 2 minutes.  Pour the oyster sauce, dark soy sauce and rice wine vinegar mixture over the vegetables and give a good toss.  Remove from the heat and let sit while you cut the duck breast. 
You could easily add other veggies into the stir fry.  Chestnut mushrooms are an excellent addition if I have them.  Don't be afraid to be creative.

Serve with a side of rice.   Bada bing bada boom.